High-quality lighting can make a huge difference in how your videos look. But professional lighting equipment is expensive.
The good news is you can create amazing lighting for your YouTube videos, product promo videos, live streams, or other productions for under $100. With some budget-friendly gear and strategic setup, your videos will look polished and professional.
In this comprehensive guide, we’ll walk through step-by-step how to choose affordable lighting equipment, position it for optimal effects, and take your video quality to the next level.
Overview of Building a 3-Point Lighting Setup
Professional videographers use a 3-point lighting setup for a balanced, dimensional look. This uses:
- Key light: The main light on your face
- Fill light: Light that fills in the background
- Backlight/hairlight: Rim light separating you from the background
We’ll build this step-by-step, starting with the most important light—the key.
Choosing Your Key Light: Softboxes for Softer Lighting
The key light illuminates the main subject directly—in this case, your face. For YouTube videos, a large, diffused key light is flattering and avoids harsh shadows.
The easiest way to diffuse light from a bulb is using a softbox. A softbox is a cube or rectangular case that has translucent fabric diffusing the light from the bulb inside. This creates a broad, soft light source instead of a narrow, focused beam.
Why Softboxes Are Better Than Spotlights
You may think grabbing a spotlight or lamp in your house and pointing it at your face would work. But this creates problems:
- The small light source casts very harsh, dark shadows
- It’s focused on just part of your face, leaving other areas dim
- The high contrast looks very unnatural and unpleasant
Softboxes create soft-edged shadows and illuminate your whole face evenly. The large surface distributes the light for a flattering look without heavy shadows.
Pick Larger Softboxes
Bigger softboxes spread the light out more evenly. An affordable option is a 3-light kit like the Mountdog softboxes. These are quite large and come with stands.
The tradeoff is the included bulbs are basic. You can’t adjust the brightness or color temperature (warm to cool tones). But for the price, starter kits like this offer great value.
For more control, choose softboxes with adjustable lighting, like the Octa 60 E softboxes. These allow you to tweak the brightness and color temperature for the perfect key light.
Adding Fill Light to Brighten Your Background
Lighting only yourself and leaving the background dark is a common mistake. This creates a high contrast between you and the background. It looks unnatural and makes it hard to see details behind you.
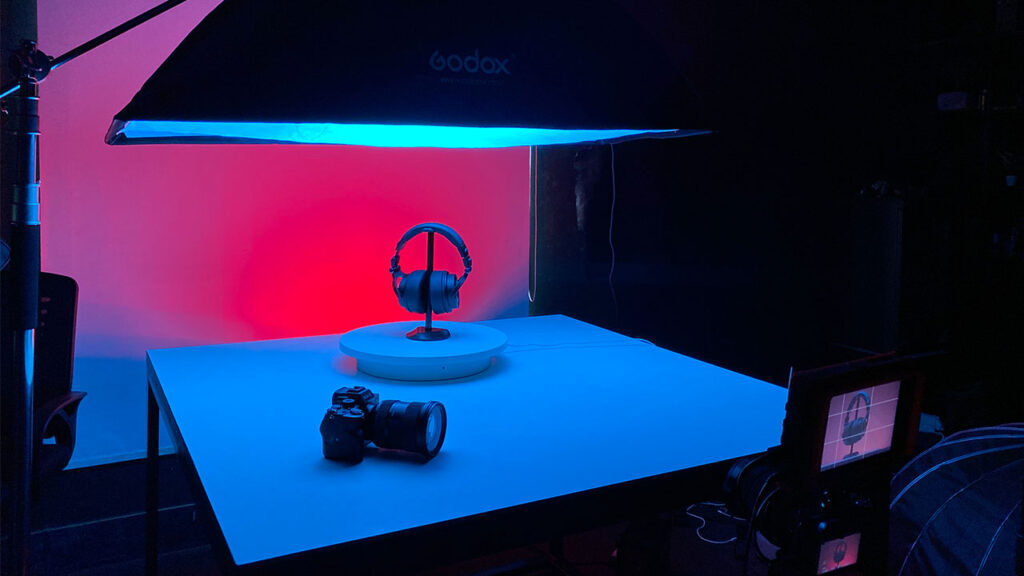
To light up the background, you need a fill light. The purpose of fill light is to fill in the shadows and illuminate the area around your main subject.
For YouTube videos, the easiest way to add fill light is by bouncing a softbox off your backdrop. Angle it at the ceiling or a wall to scatter soft light and gently fill in shadows.
Positioning Fill Light
Place your fill light source somewhere behind or beside your camera. Angle it to bounce light off the ceiling or wall behind you.
Adjust the position so it lights background details without casting definite shadows. Keep the fill light soft by bouncing it or using a diffuser.
Fill light prevents you from blending into a dark background. Subtly lighting the backdrop keeps all areas of the shot visible.
Creating Separation with Backlight or Hair Light
Even with key and fill lighting, your subject can still blend into the background if you have similar colors and tones. This happens easily if you have darker hair and clothing.
Adding backlight, also called hair light or rim lighting, creates separation between you and the backdrop. It makes you “pop” from the background.
Positioning the Backlight
Place your backlight diagonally behind you, out of the camera frame. Angle it to cast a rim of light around your head and shoulders. This rim light separates you from the blended background.
For focused backlight, you can use smaller LED panel lights. Softboxes work too but may spill more ambient light. Position it far enough behind you to not glare into the lens.
The rim of light adds a 3D, sculpted look by highlighting your shape. It adds depth that helps make your videos look more professional.
Using Accent Lighting for Visual Interest
At this point, you have all the key elements of 3-point lighting. But you can take your lighting to the next level with accent lighting. This adds visual interest and atmosphere.
Ambient Accent Lighting Ideas
Some options for accent lighting:
- Place a lamp with a warm bulb near your backdrop to cast a soft glow
- String holiday lights (out of sight) behind your set for a twinkling effect
- Use smart RGB bulbs to add color effects to the background
- Uplights on the floor behind you add flair
Tips for Positioning Accent Lights
The key is subtlety. Make sure accent lights:
- Are out of the camera frame to avoid lens glare
- Don’t overpower your key, fill, or backlight
- Provide soft, low lighting for ambiance
- Aren’t directly visible, but add a colorful glow in the background
Get creative with gels, tubes, lamps, Christmas lights, or other ambient lighting ideas!
Key Tips for Positioning Your Lighting Setup
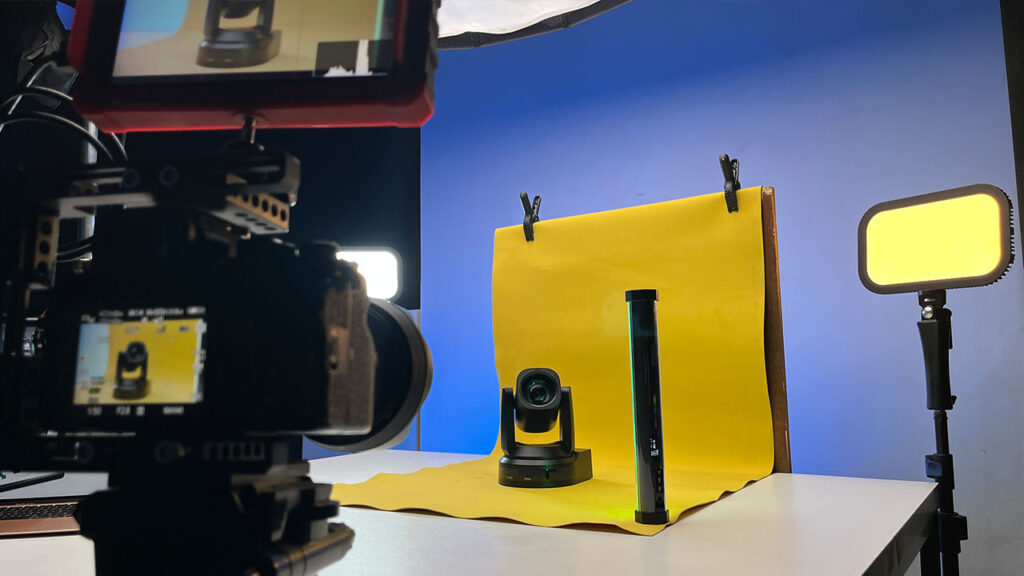
The positioning and angles of your lights make all the difference in the look. Follow these tips:
Place the Key Light Beside the Camera
Your key light should be right next to your camera, just off to one side. Having it directly in front of you cast shadows under your eyes and nose.
Place it slightly off-axis for the most natural, flattering look on your face. This avoids harsh contrasts.
Elevate Light High Enough
Position your key light so it’s aimed downward at about a 45-degree angle. This creates attractive shadowing on your facial features.
Make sure the light stands high enough to cast light evenly down on you. Place it just out of frame at about eye level or higher.
Diagonal Backlight to Separate from Background
As mentioned earlier, have your backlight diagonally opposite your key light. So if your key is camera left, have the backlight behind you to the camera right.
This cross-lighting maximizes separation and dimension. Keep the backlight angle diagonal, not directly from behind.
Fill Light Broad and Subtle
For fill lighting, diffuse it by bouncing off walls or aiming up at the ceiling. This spreads it widely across your backdrop.
Make sure it’s broad, soft illumination without defined shadows. Position it far enough away that it casts light evenly across the entire background.
Sample Gear List to Create This Lighting Setup Under $100
Here is an example of affordable lighting gear you can use to build this professional 3-point lighting setup on a budget:
- Key Light: Mountdog Softbox Light Kit (Best for beginners, simplest setup)
- Fill Light: Aputure Light Dome II or reused Mountdog softbox
- Backlight: Neewer Camera Photo/Video Dimmable Bi-color 480 LED (Upgrade with ability to control temperature)
- Accents: Govee RGB Light Bulbs (2 bulbs & controller – can be used with almost any mount/softbox)
With this sample setup, you can achieve beautifully lit videos for under $100. You can also substitute and mix and match comparable lighting kits and pieces.
Just remember— diffuse key light, fill the background shadows, backlight for separation, and accent for interest. With the right positioning and angles, your lighting will look amazing!
The key is maximizing the light you have available with careful positioning, diffusion materials, and bouncing techniques. Combine that with some affordable gear, and you can transform dark, unlit videos into professional, polished, and captivating content.
Frequently Asked Questions
Do I really need 3 lights? Can’t I just use 1?
You can light a simple video with just one key light. But adding fill and backlight brings it to the next level. 3 point lighting is the gold standard for professional, dimensional lighting.
Is gaffer tape necessary for mounting lights?
Not strictly necessary, but gaffer tape or sandbags help secure light stands in place and prevent them from falling over.
How do I prevent glare in glasses from the key light?
Position your key light above or slightly off-center rather than directly in front. Diffusing it through a softbox also helps minimize glare.
What wattage bulbs should I use?
For lighting yourself, opt for brighter bulbs in the range of 90W equivalent LED or CFLs. Overhead room lighting can be lower wattage.
Conclusion
With some budget-friendly softbox lights, stands, and basic accessories, you can set up a professional quality 3-point lighting setup for under $100. Position the lights strategically to illuminate yourself, fill in shadows, and create separation from the background. Add visual interest with accent lighting.
Following these tips will make a world of difference in the production quality of your videos. Well-lit videos instantly look more polished, professional, and appealing. The boost of quality far outweighs the small investment to light your shots.
If you want to take your product videos to the next level, the experts at Product Video Studio can help. Their talented team of 100+ professionals will handle the entire video production process for you, from scripting to lighting design to editing.
Get in touch with Product Video Studio for a complimentary consultation on creating captivating product videos tailored specifically for your e-commerce business and merchandise.
So grab some inexpensive lighting gear, position it strategically around your shot, and watch your videos shine! Partnering with Product Video Studio takes your productions to the next level.


